.
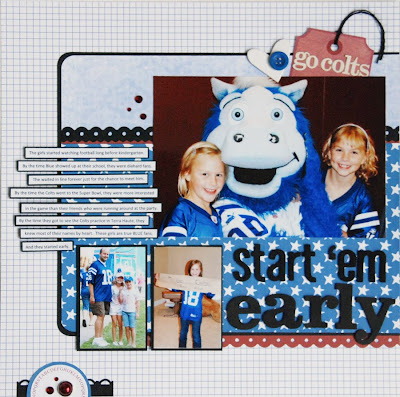
We are gearing up for the Super Bowl. Looking forward to watching the big game reminded me of some photos that I have had for some time. I have been wanting to scrap this focal photo especially. Several years back, Blue, the Colts' mascot made a visit to my girls' school. They were so very excited. (They also love to tell the story of how we met Coach Dungy on the bike trail and talked to him for quite some time. What a great guy, seriously, everything they say about him is true). Anyway, I wanted to do a layout about how much the girls love the Colts. Here is the layout I created.
.

.
This is also my first REAL hybrid page (I have printed a small piece or two before but not like this.) I had a hard time finding paper that was Colt's Blue so I turned to digit papers. I found a great kit at 2 Peas that had a wide selection of blue papers. I simply recolored them a bit to match and voila!
.
I am by no means a master at this but I thought I would share how I recolored these papers to fit my layout. I use Adobe Photoshop for all photo adjustments I make so that is what I will be showing you. Most of this is pretty easy stuff. I first pulled up my photo so I could get the right color of blue. See the two overlapping squares on the left side about half way down. Click on the top square to change the color. Now when you move your curser over the photo you will have an eye dropper. Simply click on the color you want to choose. Simple as that.
.
.

.
Now pull up your digital paper. For this part I used the Paperazzi kit from 2 Peas. Use the paint bucket to drop the new color onto your paper. Easy Peasy (as my girls would say) :)
.

.
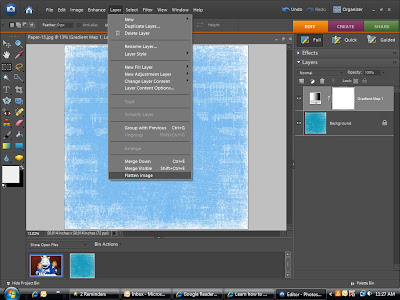
The other color change is a little more difficult but still pretty simple. Here is the other paper I wanted to change. If I used the paint bucket, I would lose all that great detail on the paper. First you want to make sure that you still have the color you want to use in the square off the the left. Now go up to the top and pull down the Layer tab. Choose New Adjustment Layer and then Gradient Map.
.

.
This should be what you see. Simply hit OK and it will change the color of your paper.
.

.
Want a really cool tip? This is how I change all of my photos to black and white too. Learned this from the great Jessica Sprague. After pulling up the Gradient Map, do not hit OK. Click on the little down arrow to the right of the color. One of your choices is a square that shows black and white. You can click that and then hit OK.
.
So now all you need to do is Flatten your layer and your paper is ready to print. To flatten go up to that Layer tab again. Go all the way to the bottom and click Flatten.
.

.
That is it. Hope that helps someone out. This was probably already well known information and I am just late to the party. LOL
.
Make sure you stop by here this week also. They are giving another free kit away at Creative Charms. Who can pass up free bling??? :)
.
Have a wonderful day and thanks so much for stopping by!

6 comments:
Awesome page! My son is a big Colts fan too!
What an awesome page!! And you new house, OMG!!! I LOVE IT!!! can I move in?? lol :-)
love the Lo and your skills at creating it!!!
My gosh, what an adorable page, Lisa!! I love, love, love that design. Fabulous photo arrangement, and look at you rocking the digital hybrid. Thanks for sharing your tips and tricks. I play a bit here and there with digital, but have sooooo much to learn yet.
What an awesome page! Hey girl, when you get a chance could you e-mail me?
WTG! looks awesome!
Post a Comment